Open your support inbox right now and count how many tickets ask some version of the same question: where is my order? If your store looks like most Aussie Shopify stores, the answer is somewhere between 20 and 40 per cent of every ticket you receive. During peak periods like EOFY and BFCM, it climbs past 50 per cent.
What’s in This Article
Here is the part that should sting. Every one of those tickets costs you between $5 and $25 in support time to answer. And every one of them was preventable, because the customer was not really asking a question. They were telling you that your post-purchase experience left them anxious enough to chase you.
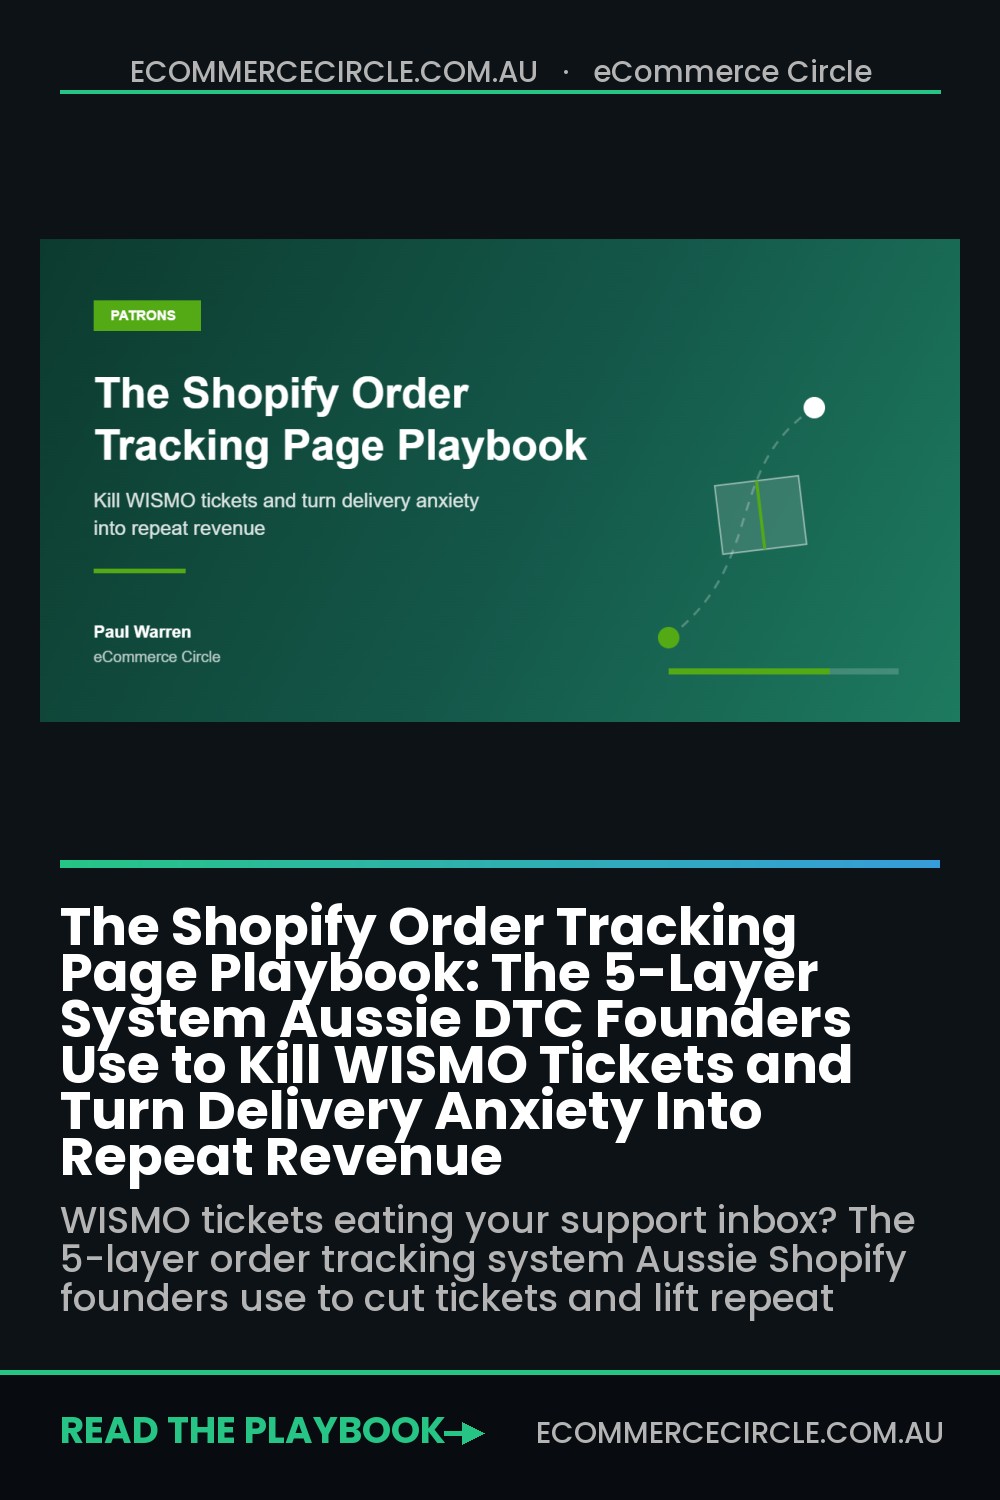
Most founders treat the gap between checkout and doorstep as the courier’s problem. Successful brands treat it as the highest-attention window in the entire customer lifecycle, and they own every minute of it. This playbook shows you the 5-layer system to do exactly that: a branded tracking page, a proactive notification flow, delay handling that gets ahead of the customer, and a measurement loop that turns delivery anxiety into repeat revenue.
The Maths: Your Most-Read Message Is the One You Are Ignoring
Your shipping confirmation email gets opened more than anything else you will ever send. Transactional shipping emails routinely hit 55 to 75 per cent open rates, against the 20 to 30 per cent a decent marketing campaign pulls. A delay notification can reach 70 to 80 per cent. No flash sale subject line will ever touch those numbers.
Customers do not stop at opening, either. They click through to the tracking page and they come back to it again and again, typically three or more visits per order. That is three guaranteed brand touchpoints per purchase, handed to you for free.
Now zoom out to the Australian context. Australia Post’s eCommerce Report put online spend at a record $69 billion across 9.8 million households, and 85 per cent of shoppers say a reliable delivery experience is the single most important factor in whether they trust an online retailer over the next five years. Roughly one in four now expects same or next-day delivery when something is urgent.
So the moment of highest customer attention, and the moment that decides whether they trust you enough to buy again, is the same moment most stores outsource to a plain AusPost tracking page covered in another company’s branding. That is the leak. Here is how to plug it, layer by layer.
Layer 1: Bring the Tracking Page Home
The default Shopify order status page is functional but generic, and a raw carrier link is worse: it sends your customer to a page you do not control, with no products, no brand voice, and ads for the courier’s other services. Layer 1 replaces both with a branded tracking page that lives on your own domain.
The proof that this matters is not theoretical. Wedding brand Miss to Mrs found that 45 per cent of its online store visits originated from its branded tracking page, and attributed 25 per cent of online sales to it. Wallet brand The Ridge sees an 80 per cent click-through rate from its shipping emails to its tracking page. When that much of your traffic flows through one URL, that URL should be yours.
Your branded tracking page needs five elements, in this order of priority:
- A visual progress bar. Order placed, packed, in transit, out for delivery, delivered. Customers want a glance, not a scan history table.
- A plain-English status line. “Your order left our Melbourne warehouse this morning” beats “Item processed at facility” every single time.
- An honest delivery estimate. A date range you update when things change, not a static promise you abandon.
- Self-service answers. Your three most common delivery FAQs right on the page: what happens if I am not home, how do I change my address, what if my parcel is late.
- One commercial module. A product recommendation row, a referral offer, or care instructions for the product they bought. One, not five. The page’s job is reassurance first.
One non-negotiable: the page must work properly on a phone. Most tracking checks happen on mobile, often standing at the front door or waiting for a tradie. If your progress bar collapses into a mess at 375 pixels wide, you have rebuilt the problem you were trying to fix.
Layer 2: Build the Proactive Notification Flow
A branded page only helps if customers land on it. Layer 2 is the notification cadence that walks every order from checkout to doorstep without the customer ever needing to ask. The goal is simple: answer the question before it is asked.
Here is the six-touch sequence we see working across Aussie DTC stores:
- Touch 1: Order confirmation (instant). Sets expectations: when it ships, how long delivery usually takes, link to the tracking page even before there is a tracking number.
- Touch 2: Shipped (on fulfilment). The big one. Tracking link, carrier, delivery window. Send it the moment the label is scanned, not when the batch export runs at midnight.
- Touch 3: In transit check-in (48 hours later). Only if the parcel is moving normally. A light touch that says everything is on track, plus one piece of helpful content about the product.
- Touch 4: Out for delivery (day of). Highest urgency, best read rates. This is the touch worth sending by SMS as well as email.
- Touch 5: Delivered (on delivery scan). Confirm it arrived, show what to do if it did not, and introduce the first gentle commercial message.
- Touch 6: Post-delivery follow-up (2 to 3 days later). Review request, care tips, or a referral nudge depending on your margin and product cycle.
Every touch links to your branded tracking page, never to the raw carrier URL. That is what produces numbers like The Ridge’s 80 per cent click-through, and it is why brands that centralise the post-purchase journey see results like Vivino’s 30 per cent lift in repeat sales after overhauling tracking communications.
If you already run a post-purchase email sequence for marketing, do not bolt these into the same flow. Transactional updates and marketing nurture have different jobs. We covered the marketing side in our post-purchase SMS retention sequence; this flow exists purely to remove anxiety.
Layer 3: Catch Delays Before the Customer Does
Here is the uncomfortable truth about WISMO: the tickets that actually damage your brand are not the routine ones. They are the ones where the parcel sat in a Chullora facility for four days and the customer found out before you did. Delay handling is where average stores and great stores separate.
The mechanic is a stalled shipment trigger. Your tracking tool watches carrier scans, and if a parcel records no movement for 48 hours (24 during peak season), it fires three things at once:
- A proactive email to the customer. Plain language: your order has hit a delay, here is the updated estimate, here is what we are doing, you do not need to do anything. Delay emails are the most-opened message in commerce at 70 to 80 per cent, so write it like a human.
- An internal alert to support. Tag the order so if the customer does reach out, your team already has context and a macro ready instead of starting an investigation from scratch.
- A carrier follow-up task. For parcels stalled beyond 5 business days, someone owns chasing the courier and deciding on a reship before the customer demands one.
The psychology does the heavy lifting. A delay the brand announces reads as transparency and earns trust. The identical delay discovered by the customer reads as negligence. Same parcel, same delay, opposite outcomes for repeat purchase. If lost and damaged parcels are a recurring cost for you, pair this layer with the shipping insurance playbook so the recovery process is funded as well as fast.
Layer 4: Turn the Tracking Page Into a Quiet Salesperson
Once reassurance is handled, the tracking page becomes the cheapest retail space you own. The customer arriving on it has already paid, is actively excited about your product, and is visiting multiple times. No cold audience on Meta will ever be this warm.
The brands doing this well follow a sequencing rule: match the commercial message to the delivery stage.
- In transit: educate. How to use, style, store, or care for what they bought. A skincare brand shows a routine guide. A coffee roaster shows grind settings. Education here measurably reduces returns and refund requests later.
- Out for delivery: prepare. Unboxing teaser, setup video, or a sizing reminder with your exchange link. This is also the perfect moment to reinforce the experience you designed in the unboxing playbook.
- Delivered: convert. Now, and only now, show the cross-sell row. Complementary products beat bestsellers here: the customer just bought running shoes, so show socks and recovery gear, not more shoes.
Keep offers modest. A 10 per cent next-order code on the delivered screen feels like a thank you. A 30 per cent code feels like desperation and trains the discount-waiting behaviour you spent all year avoiding. Miss to Mrs attributing a quarter of its sales to this single page is not an outlier result; it is what happens when warm traffic meets relevant product at the right moment.
Layer 5: Measure What Changed
You cannot manage the post-purchase window on vibes. Five numbers tell you whether the system is working, and all five are available in your helpdesk and tracking tool within a week of launch:
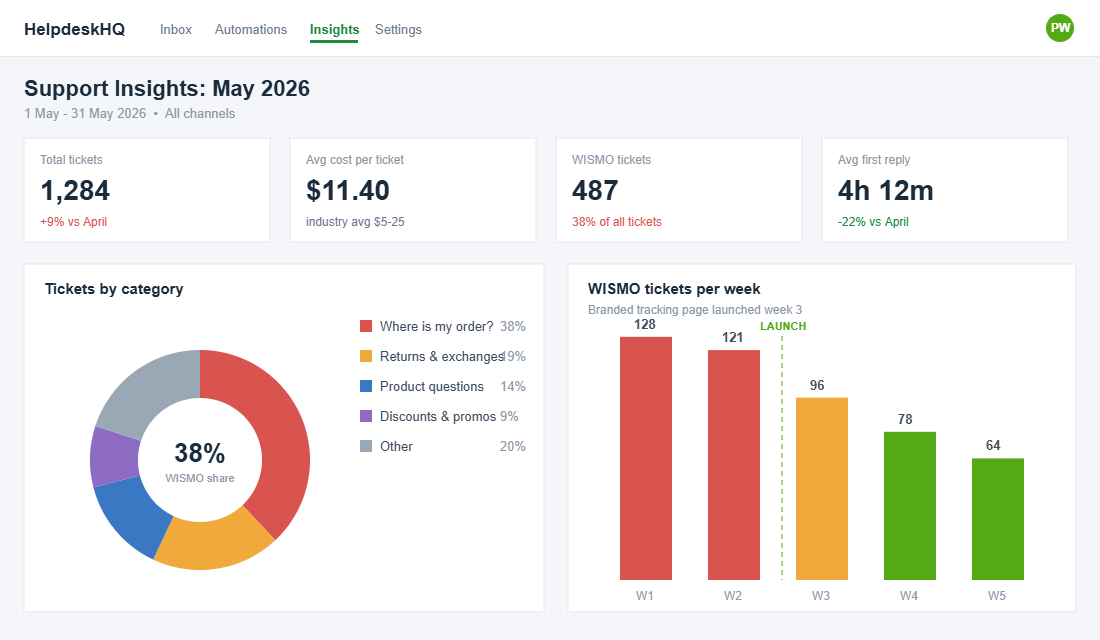
- WISMO rate. WISMO tickets divided by orders shipped. Get it under 5 per cent in normal months. Brands that centralise tracking properly report cuts of 40 per cent and more, and platform-wide AfterShip data shows reductions up to 75 per cent.
- Notification engagement. Open and click rates per touch. A shipped email under 50 per cent opens usually means a deliverability or timing problem, not a copy problem.
- Tracking page visits per order. Two to four is healthy. Above five suggests your delivery estimates are vague enough to cause repeat checking.
- Attributed revenue. Sales from tracking page modules and post-delivery codes. This is the line that pays for the tool.
- Repeat purchase rate, 90 days. The lagging indicator. Watch your cohort numbers shift one to two quarters after launch.
The Tool Stack: What to Install and How to Set It Up
You do not need to custom-build any of this. The category is mature and the leading tools install in an afternoon.
AfterShip Tracking is the most common starting point, with a free tier that covers smaller stores. Setup looks like this:
- Step 1. Install AfterShip Tracking from the Shopify App Store and connect your store. Orders and tracking numbers sync automatically.
- Step 2. Confirm your carriers. Australia Post, Aramex, CouriersPlease, Sendle and Shippit are all supported. Turn on auto-detection.
- Step 3. Build the branded tracking page: logo, brand colours, your domain (track.yourstore.com.au), delivery FAQs, one recommendation module.
- Step 4. Switch on notifications for shipped, out for delivery, delivered, and crucially, the exception and stalled-shipment triggers. Point every link at your branded page.
- Step 5. Update the order confirmation and shipping confirmation templates in Shopify settings so native emails also link to your page.
Loop Tracking (built on Wonderment, which Loop acquired) is the strongest option if returns and exchanges are a big part of your operation, since tracking and returns live in one experience. Rush and Track123 are solid budget alternatives. If you run your flows in Klaviyo, both AfterShip and Loop push shipment events into it, so your delay emails can use the same segmentation and brand templates as everything else. And whichever tool you choose, leave the Shop app tracking on as well; plenty of Aussie customers live in it, and it costs you nothing.
The Four Mistakes That Undo the Whole System
We see the same failure patterns whenever a member shows us a tracking setup that is not paying off. Check yourself against these four before you blame the tool.
- Linking to the carrier anyway. The app is installed, the page is built, and the Klaviyo shipped email still points at auspost.com.au because nobody updated the template. Audit every email and SMS that contains a tracking link.
- Overpromising the delivery window. If you quote 2 to 4 days and the realistic regional figure is 5 to 7, you have manufactured your own WISMO tickets. Quote honest ranges by zone and beat them.
- Turning the page into a billboard. Three upsell carousels, a spin-to-win popup and a newsletter modal before the customer can see where their parcel is. Reassurance first, commerce second, always.
- Going silent on weekends. Parcels stall on Saturdays too. Your delay triggers and alerts should run seven days, even if humans only follow up on Monday.
None of these are tooling problems. They are ownership problems, and they are all fixable in an hour each.
The Compound Effect: Why the Layers Multiply
Run the layers separately and each one earns its keep. Run them together and they compound, because each layer feeds the next.
The branded page (Layer 1) gives your notifications (Layer 2) somewhere worth clicking, which is how you get 50 per cent plus of customers landing on your domain instead of the courier’s. Proactive delay handling (Layer 3) removes the angriest tickets from your queue, which frees your support team to answer the remaining questions faster, which lifts satisfaction again. The commercial modules (Layer 4) only convert because Layers 1 to 3 built trust at the exact moment the customer was paying attention. And the measurement loop (Layer 5) shows you which touch to improve next quarter.
Do the maths on a store doing 1,000 orders a month. A 30 per cent WISMO rate at $10 a ticket is roughly $3,000 a month in support cost. Cut it to 10 per cent and you bank $2,000 a month before counting a dollar of tracking page revenue. Add a conservative 1 per cent of orders converting again through the delivered-screen cross-sell and the system pays for itself several times over. The tool costs less than your coffee budget.
And the real prize is none of those line items. It is that 85 per cent of Australian shoppers deciding whether to trust you based on delivery experience. Every parcel that arrives wrapped in calm, proactive communication is a deposit into the repeat-purchase account.
Your 12-Point Order Tracking Checklist
Work through this list over one focused week. Most stores can tick all twelve in under ten working hours.
- 1. Measure your current WISMO rate (WISMO tickets divided by orders shipped, last 90 days).
- 2. Install a tracking tool (AfterShip, Loop Tracking, Rush or Track123) and sync carriers.
- 3. Build the branded tracking page on your own subdomain with progress bar and plain-English statuses.
- 4. Add your top three delivery FAQs to the page.
- 5. Add one commercial module, sequenced by delivery stage.
- 6. Check the page on a real phone, not just a resized browser window.
- 7. Switch on the six-touch notification flow and point every link at your page.
- 8. Add the out-for-delivery SMS.
- 9. Configure the stalled-shipment trigger at 48 hours with the proactive delay email.
- 10. Create the internal support alert and a delay macro for your team.
- 11. Update Shopify’s native order emails to link to the branded page.
- 12. Set a calendar reminder to review the five metrics 30 days after launch.
Inside eCommerce Circle, the post-purchase experience is one of the core Patrons pillars we work on with every member, because retention is the cheapest growth lever most stores have not pulled yet. If you want a second opinion on yours, let’s talk.