Product photography is the single most undervalued investment in ecommerce. You can have the best product in your category, the smoothest checkout, and the most targeted ads — but if your photos look like they were taken on a phone in bad lighting, none of it matters. Online shoppers cannot touch, feel, or try your product. Your photos are their only sensory experience, and they make snap judgements in less than a second.
What’s in This Article
The data backs this up: 75% of online shoppers say product photos are the most influential factor in their purchase decision. Not price. Not reviews. Photos. And yet most Shopify store owners are still using supplier images, inconsistent backgrounds, or DIY shots that look amateurish next to their competitors.
The good news is that you do not need a $50,000 studio to create professional product photography. With the right setup — which can cost as little as $500-$1,000 upfront — you can produce photos that rival major DTC brands. Here is exactly how to set up, shoot, and optimise product photography for your Shopify store.
The Two Types of Product Photos You Need
Every product on your Shopify store needs two types of photography, and they serve very different purposes.
Clean product shots (white or neutral background). These are your workhorse images. They show the product clearly, from multiple angles, on a clean white or light grey background. They are used in your product grid, collection pages, Google Shopping feeds, and marketplace listings. The goal is clarity — the customer should be able to see exactly what they are buying. You need a minimum of 4-6 clean shots per product: front, back, side, detail close-up, scale reference, and packaging if relevant.
Lifestyle photography (in-context shots). These show the product being used in real life — on a person, in a home, in an environment that reflects your target customer’s aspirations. Lifestyle photos are used as hero images on product pages, in ads and social media, on your homepage, and in email campaigns. They sell the dream, not just the product. A candle on a white background is a candle. A candle on a timber coffee table next to a book with soft afternoon light is a mood.
Most Shopify stores under-invest in lifestyle photography because it feels harder and more expensive. But even 2-3 lifestyle shots per hero product can dramatically increase conversion rates — lifestyle images on product pages have been shown to increase add-to-cart rates by 20-30%.
DIY Product Photography Setup
You do not need to hire a professional photographer for every product shoot. Here is a budget-friendly setup that produces professional results.
Camera. A recent iPhone or Samsung flagship (iPhone 13+ or Galaxy S22+) produces excellent product photos. If you prefer a dedicated camera, a Sony A6000 or Canon EOS M50 with a 50mm lens gives you DSLR quality at an affordable price point ($800-$1,200 AUD used). The camera matters less than lighting — a phone with great lighting beats a DSLR with bad lighting every time.
Lighting. This is where most DIY product photos fail. Natural light from a large window works well for lifestyle shots, but for clean product shots, you need consistent, controlled lighting. Two softbox lights ($100-$200 AUD for a pair) positioned at 45-degree angles to the product eliminate harsh shadows and create even, professional illumination. A third light or reflector below the product fills in remaining shadows.
Background. For clean shots, a roll of white seamless paper ($30-$50 AUD) curved from a wall to a table creates the infinite white background you see on professional ecommerce sites. For lifestyle shots, invest in 2-3 flat-lay surfaces — timber, marble, linen — that match your brand aesthetic. You can buy flat-lay boards from photography suppliers for $50-$100 each.
Tripod and shooting table. A tripod ($50-$100 AUD) ensures consistent framing across all products — critical for a professional-looking collection grid. A small shooting table or elevated surface at a comfortable height lets you shoot from multiple angles without moving the lighting setup.
Shooting Techniques That Make a Difference
The difference between amateur and professional product photos often comes down to a few simple techniques.
Consistency is king. Every product should be shot with the same lighting, same angle, same background, and same editing treatment. Inconsistent photos make your store look unprofessional even if individual images are decent. Create a shot list template and use it for every product: front hero, back, left side, detail 1, detail 2, lifestyle.
Show scale. One of the biggest frustrations for online shoppers is not understanding how big or small a product is. Include at least one image that shows scale — the product in a hand, next to a common object, or on a person. This alone reduces returns caused by size expectations.
Capture detail close-ups. Texture, stitching, material quality, and finish are things customers would check in a physical store. Give them that ability online with close-up detail shots. For apparel, show the fabric weave. For jewellery, show the clasp and stone setting. For food products, show the actual product texture, not just the packaging.
Use natural-looking models. If your product is worn or used by people, show it on real people — not just flat lays. Models do not need to be professionals. Real customers, friends, or micro-influencers often create more relatable images than studio models. Diversity in body types, ages, and skin tones also helps customers see themselves using your product.
Editing and Optimisation for Shopify
Post-production editing transforms good photos into great ones. Here is what to focus on.
- Background removal or cleanup. For clean product shots, use tools like remove.bg, Canva, or Adobe Photoshop to ensure a pure white background. Consistent white backgrounds across all products creates a premium, cohesive look in your collection grids.
- Colour accuracy. Ensure the product colour in photos matches the real product as closely as possible. Colour mismatches are one of the top reasons for returns. Use a grey card during shooting and calibrate your display for editing.
- Image sizing for Shopify. Shopify recommends square images (2048×2048 pixels) for the most consistent display across themes. Compress images to under 500KB using tools like TinyPNG or Shopify’s built-in optimisation. Large image files kill your page load speed, which kills conversions.
- Alt text for SEO. Write descriptive alt text for every product image: “Women’s relaxed fit linen shirt in sage green — front view” is better than “IMG_4523.jpg.” Alt text helps Google understand your images and can drive traffic through Google Image Search.
When to Hire a Professional
DIY photography works well for most products, but there are times when hiring a professional is worth the investment. If your products are highly reflective (jewellery, glassware), very small (electronics components, accessories), or require complex styling (food, fashion on models), a professional photographer will produce significantly better results. Expect to pay $500-$2,000 AUD for a half-day product shoot with 20-40 final images. That is $25-$50 per image — a one-time investment that pays for itself many times over in conversions.
The Shopify Image Specs That Protect Speed and Conversions
Great photos that load slowly still cost you sales. Images are typically 50 to 60% of the total weight of a Shopify product page, and Google’s own data shows conversion rates drop by around 7% for every extra second of load time. So once you’ve shot well, you need to publish smart.
Here are the specs to hold yourself to. Shoot and upload square images at 2048 x 2048 pixels so Shopify’s zoom works cleanly without you uploading anything heavier than you need. Keep each file under roughly 100 to 150KB after compression. Run every image through TinyPNG, Crush.pics, or Shopify’s built-in image optimisation before it goes live, and let Shopify serve WebP automatically so modern browsers get the lighter format.
Two more easy wins: write descriptive alt text on every image (it helps both accessibility and Google Image search, which is a real traffic source for product-led stores), and keep one consistent aspect ratio across a collection so your grid doesn’t shift and jump as it loads. If page speed is already a sore point for you, work through the Shopify site speed playbook alongside this, because heavy imagery is the single most common cause of a slow storefront.
A Reusable Shot List You Can Hand to Anyone
The fastest way to get consistent photography, whether you’re shooting it yourself, briefing a freelancer, or pointing a phone at the kitchen bench, is a fixed shot list. Use the same one for every product so your catalogue looks like it belongs to one brand instead of seven.
For each product, capture: a clean hero shot on white (your main thumbnail), a 45-degree angle shot, a scale or in-hand shot so buyers judge size, a macro detail shot of texture or finish, a lifestyle shot showing the product in use, and a back or packaging shot. That’s six images per product, which is the sweet spot. Stores that show six or more photos per product consistently convert better than those showing one or two, because every extra angle removes a reason to hesitate.
Add a seventh slot for user-generated content once you have customers. Real customer photos can lift product-page conversion by 5 to 8%, and they cost you nothing to collect. The only question worth testing is which image earns the hero slot, so run that as a proper experiment using the Shopify A/B testing playbook rather than guessing. Edit everything in Lightroom or Capture One for a consistent look, and use Canva or PhotoRoom if you need quick background removal without a studio. If you’re capturing browsers who aren’t ready to buy yet, pair strong imagery with the saved-item tactics in the Shopify wishlist playbook.
Your Photos Are Your Sales Team
In ecommerce, your product photos do the job that a physical store’s ambience, displays, and sales staff do. They create first impressions, build trust, communicate quality, and overcome the sensory gap of online shopping. Invest in them accordingly — even a modest improvement in photography quality can lift your conversion rate by 10-20% across your entire store.
Inside the eCommerce Circle, product photography falls under our Platform pillar — getting your storefront right before scaling traffic to it. If your product photos need an upgrade and you are not sure where to start, our coaching covers the exact setup, techniques, and editing workflow that works for Australian Shopify brands at every budget level.
Want your product pages reviewed before you spend another dollar driving traffic to them? Inside eCommerce Circle we look at your imagery, layout, and product detail pages together and hand you a prioritised shot list and fix plan tailored to your budget.
User-Generated Photos: The Social Proof That Outsells Studio Shots
Polished studio images build trust, but real customer photos close the sale. Shoppers know the difference between a styled hero shot and a product photographed on someone’s kitchen bench, and the second one answers the question every buyer is silently asking: will this look right in my life, not just in your catalogue?
The data backs it up. Product pages that feature customer photos convert up to 5 to 8% higher than pages with studio images alone, and around 62% of shoppers say they are more likely to buy when they can see photos from other customers. For Aussie brands that cannot justify a monthly studio budget, this is the cheapest high-quality imagery you will ever get, because your customers shoot it for you.
- Collect it automatically. Apps like Loox, Okendo and Yotpo prompt for a photo at the review request stage, then let you embed those images straight onto the product page and collection grid.
- Curate, do not dump. Feature the 6 to 10 shots that show the product in use, in different settings, on different people. Variety does the selling.
- Light-edit only. Crop and straighten, but keep UGC looking real. Over-polished customer photos lose the authenticity that makes them work.
Treat UGC as a layer on top of your studio set, not a replacement. The studio shots carry the product page hero and gallery, and the customer photos carry the proof lower down. If you are building out reviews and photo collection properly, the product reviews playbook covers the full social-proof system.
Make Every Image Earn Its Place on Mobile
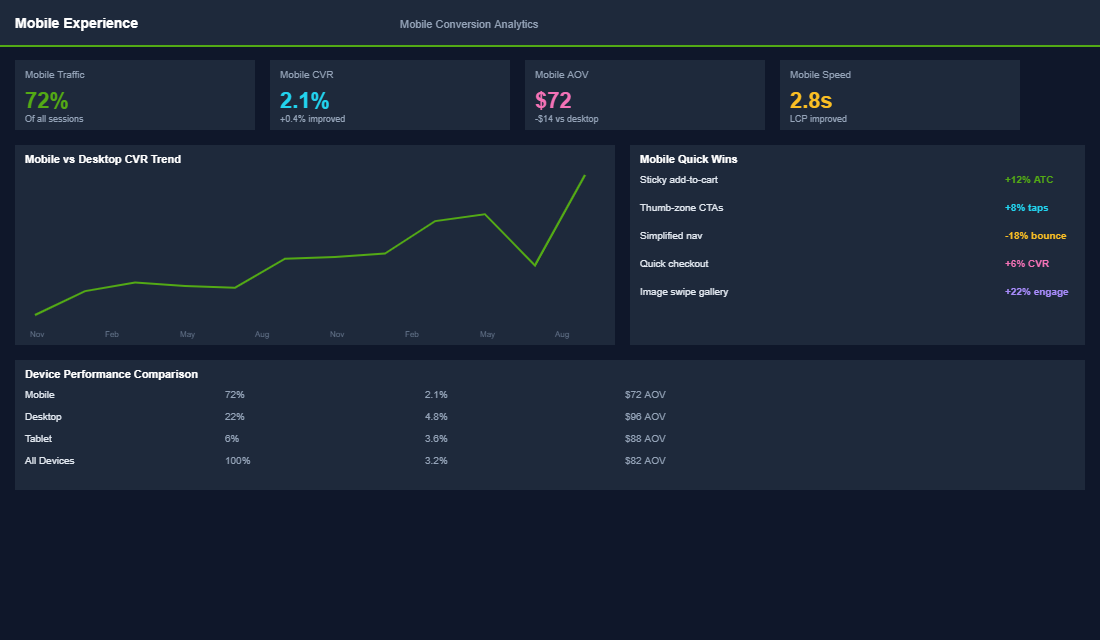
More than 70% of Shopify traffic now comes from a phone, so your photos are judged on a 6-inch screen before they are ever seen on a desktop. A gorgeous 4000px hero that takes four seconds to load on 4G does more damage than a smaller, sharp image that appears instantly. Every 1 second of added load time can cut conversions by around 7%.
Export at roughly 2048px on the longest edge, compress to WebP, and let Shopify serve responsive sizes. Check the result against your site speed targets, and confirm the imagery actually moves the needle by watching add-to-cart rate in your conversion tracking setup. Pretty photos are a means to an end, and the end is measured in orders, not likes.
The 2026 AI Editing Stack: Studio Results From a Phone Shoot
The editing landscape has shifted hard in the last two years. Work that used to need a retoucher at $5 to $15 per image can now be done in minutes, and the quality gap has nearly closed for standard ecommerce shots.
- Photoroom or remove.bg: batch background removal at around $15 to $25 AUD a month. Shoot on a kitchen bench, ship on a clean white background.
- Shopify’s built-in AI image editing: free on every plan. Generate lifestyle backgrounds for existing product shots straight inside the admin. Good for testing scenes before paying for a real lifestyle shoot.
- Canva Pro: about $18 AUD a month for background removal, batch resizing and template-based infographic images for your product pages.
- Lightroom presets: build one preset for your brand and apply it to every shoot. Consistency across your catalogue matters more than any single hero image.
One warning: do not use AI to fake the product itself. Generated backgrounds are fine. Generated product details are a refund machine, because around 22% of all ecommerce returns trace back to “item not as pictured”. The product in the photo must be the product in the box.
And once you have a new set of images live, treat them like any other conversion lever. Run the old hero shot against the new one using the process in our Shopify A/B testing playbook and let the data pick the winner. Members who test imagery properly typically find one variant that lifts product page conversion 10% to 20%, which is a far better return than reshooting the whole catalogue on instinct.
Inside eCommerce Circle, getting your product imagery to actually convert is one of the core pillars we work on with members. If you want a second opinion on your product pages and photography, let’s talk.